Generate Custom Maps for Geo Heat Map Module
Overview
The Geographic Heat Map reporting module allows a company to highlight a single metric across a geography such as each state of the United States or country of the world. While the Medallia Experience Cloud provides several commonly-used maps, it also allows customers to use their own custom maps to make reporting more personalized and relevant.
The Geographic Heat Map module requires that any provided map be formatted in a TopoJSON format and include an id field that corresponds to a Unit Group within the Experience Cloud instance.
In this example, we will be taking the Admin 1 - States, Provinces (without large lakes) map data from http://www.naturalearthdata.com/downloads/110m-cultural-vectors and generating a module-compatible map using the ug_states unit group from the Medallia Universal Starter (Base) package, installed by default on all new Experience Cloud instances.
Generating and using a custom map is a four-step process:
- Find the correct map attribute to map to the Experience Cloud Unit group.
- Transform the map into TopoJSON, typically using MapShaper.
- Generate the Parameters file.
- Reference the generated files within Experience Cloud.
Requirements
The following are required third-party dependencies to take advantage of the example commands in this guide:
- Admin 1 - States, Provinces (without large lakes) map data, compressed in a ZIP file.
- NodeJS version 10 or greater.
- MapShaper, installed using
npm -i g mapshaper. - JQ.
Having a rudimentary understanding of GIS and Shape Files can also be beneficial in following the transformation logic described below.
Finding the Correct Map Attribute to Link to the Unit Group
The first step is to find which shape attribute to use to link to the Experience Cloud nit groups.
It helps to familiarize yourself with what unit groups already exist on the MEC instance, to allow you to pattern-match in future steps. Via Admin Suite, explore the list of unit groups:
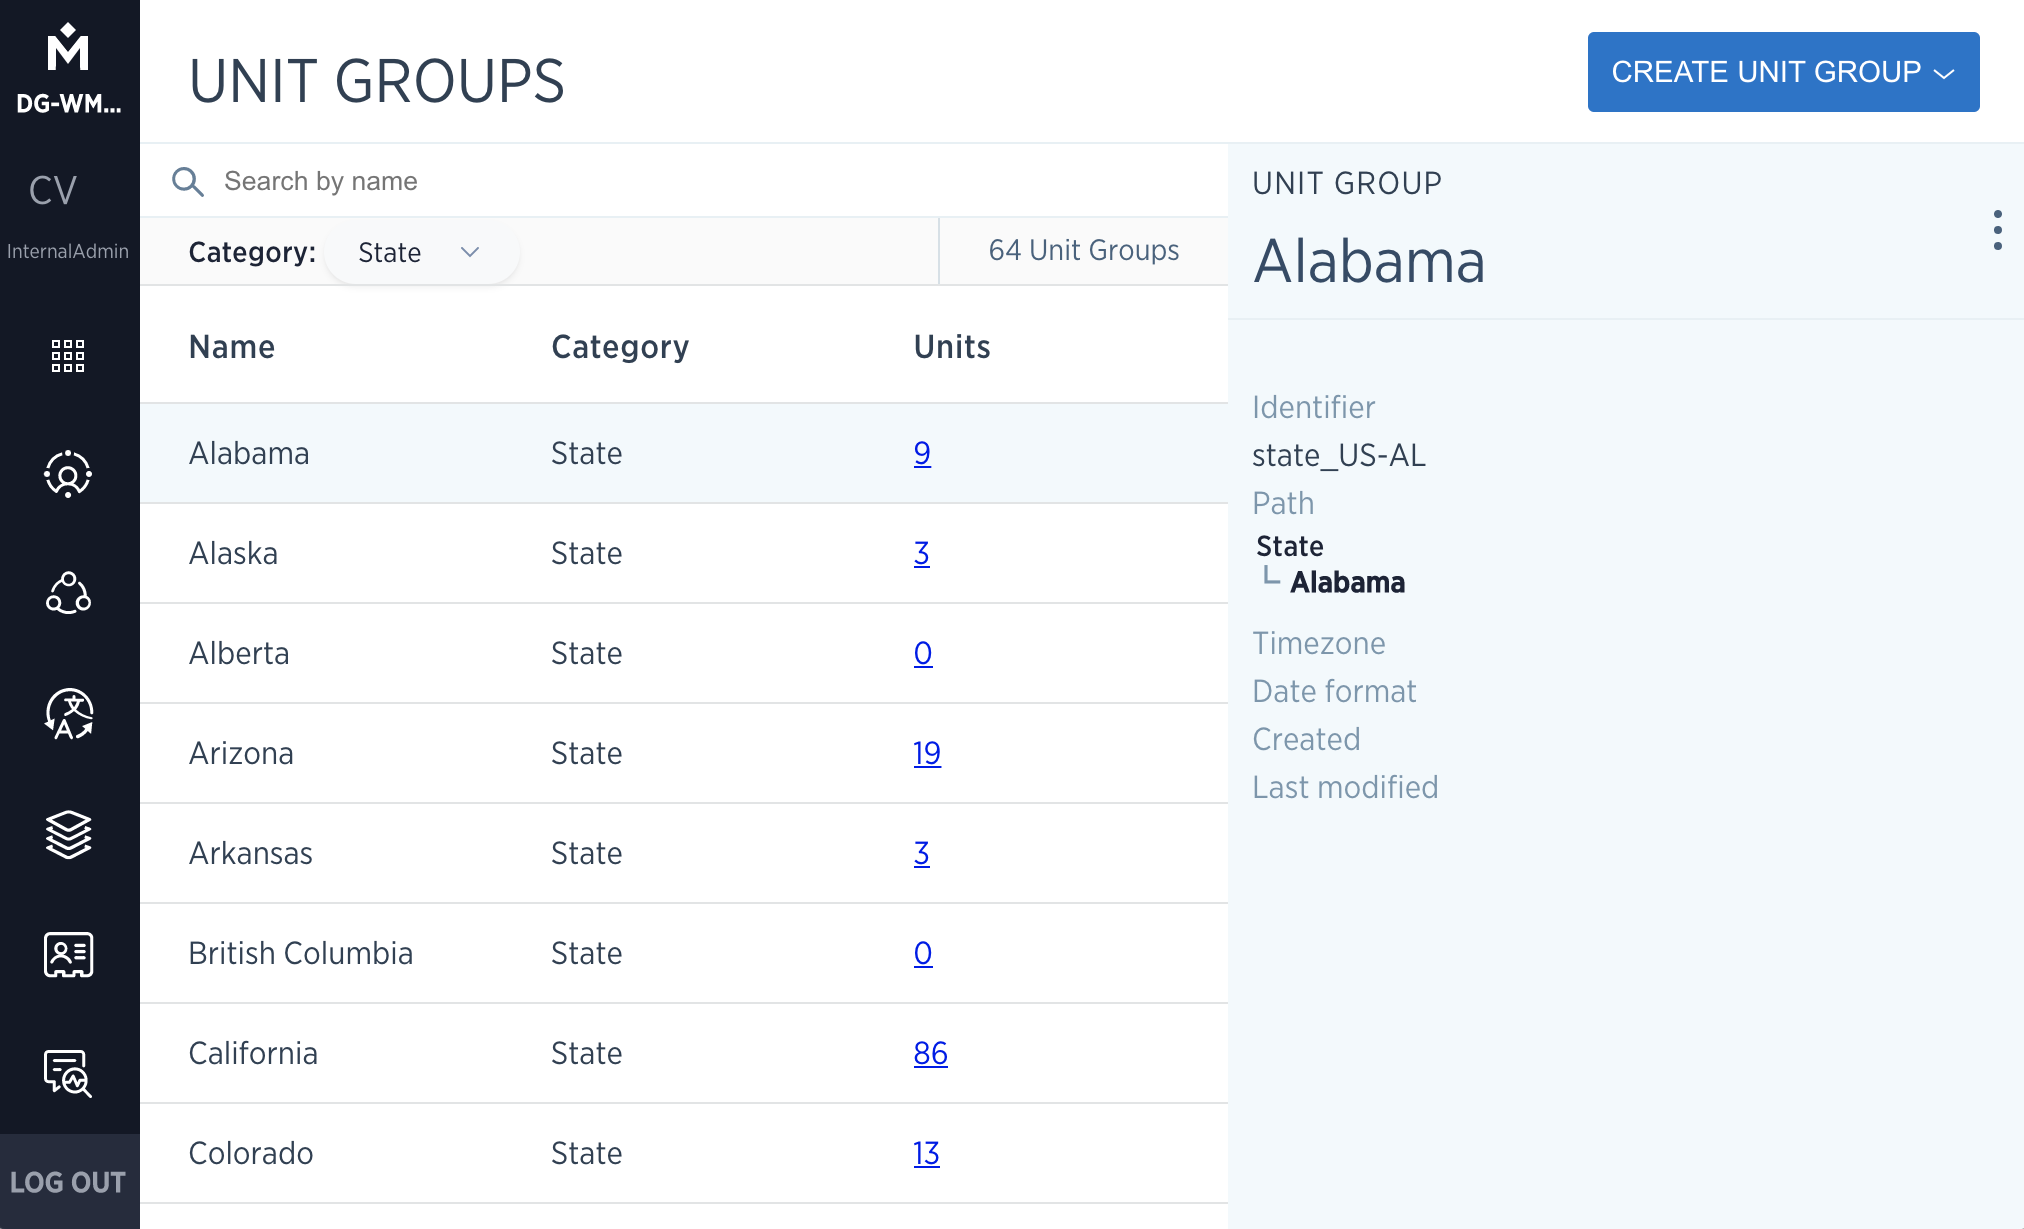
We’ll note that the unit group identifier appears to be an ISO code (ex: US-AL) prefixed with state_. From scanning several unit groups in the list, this looks to be consistent as a pattern.
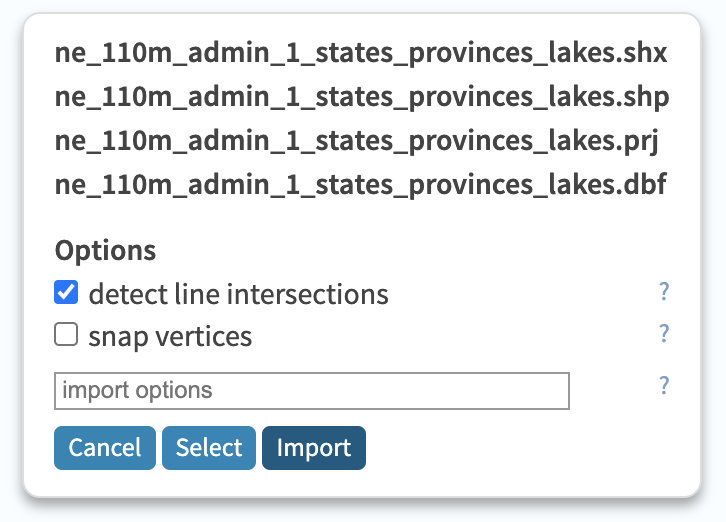
Next, we explore the map data using the MapShaper Web UI. Download the map ZIP file, and drag-and-drop the file to the MapShaper UI. You’ll be prompted to import the data:
The map now renders. From the right side menu, hover over the mouse arrow icon and select Inspect Features. Next, click on one of the shapes in the map to see the attributes appear on the left side of the window:
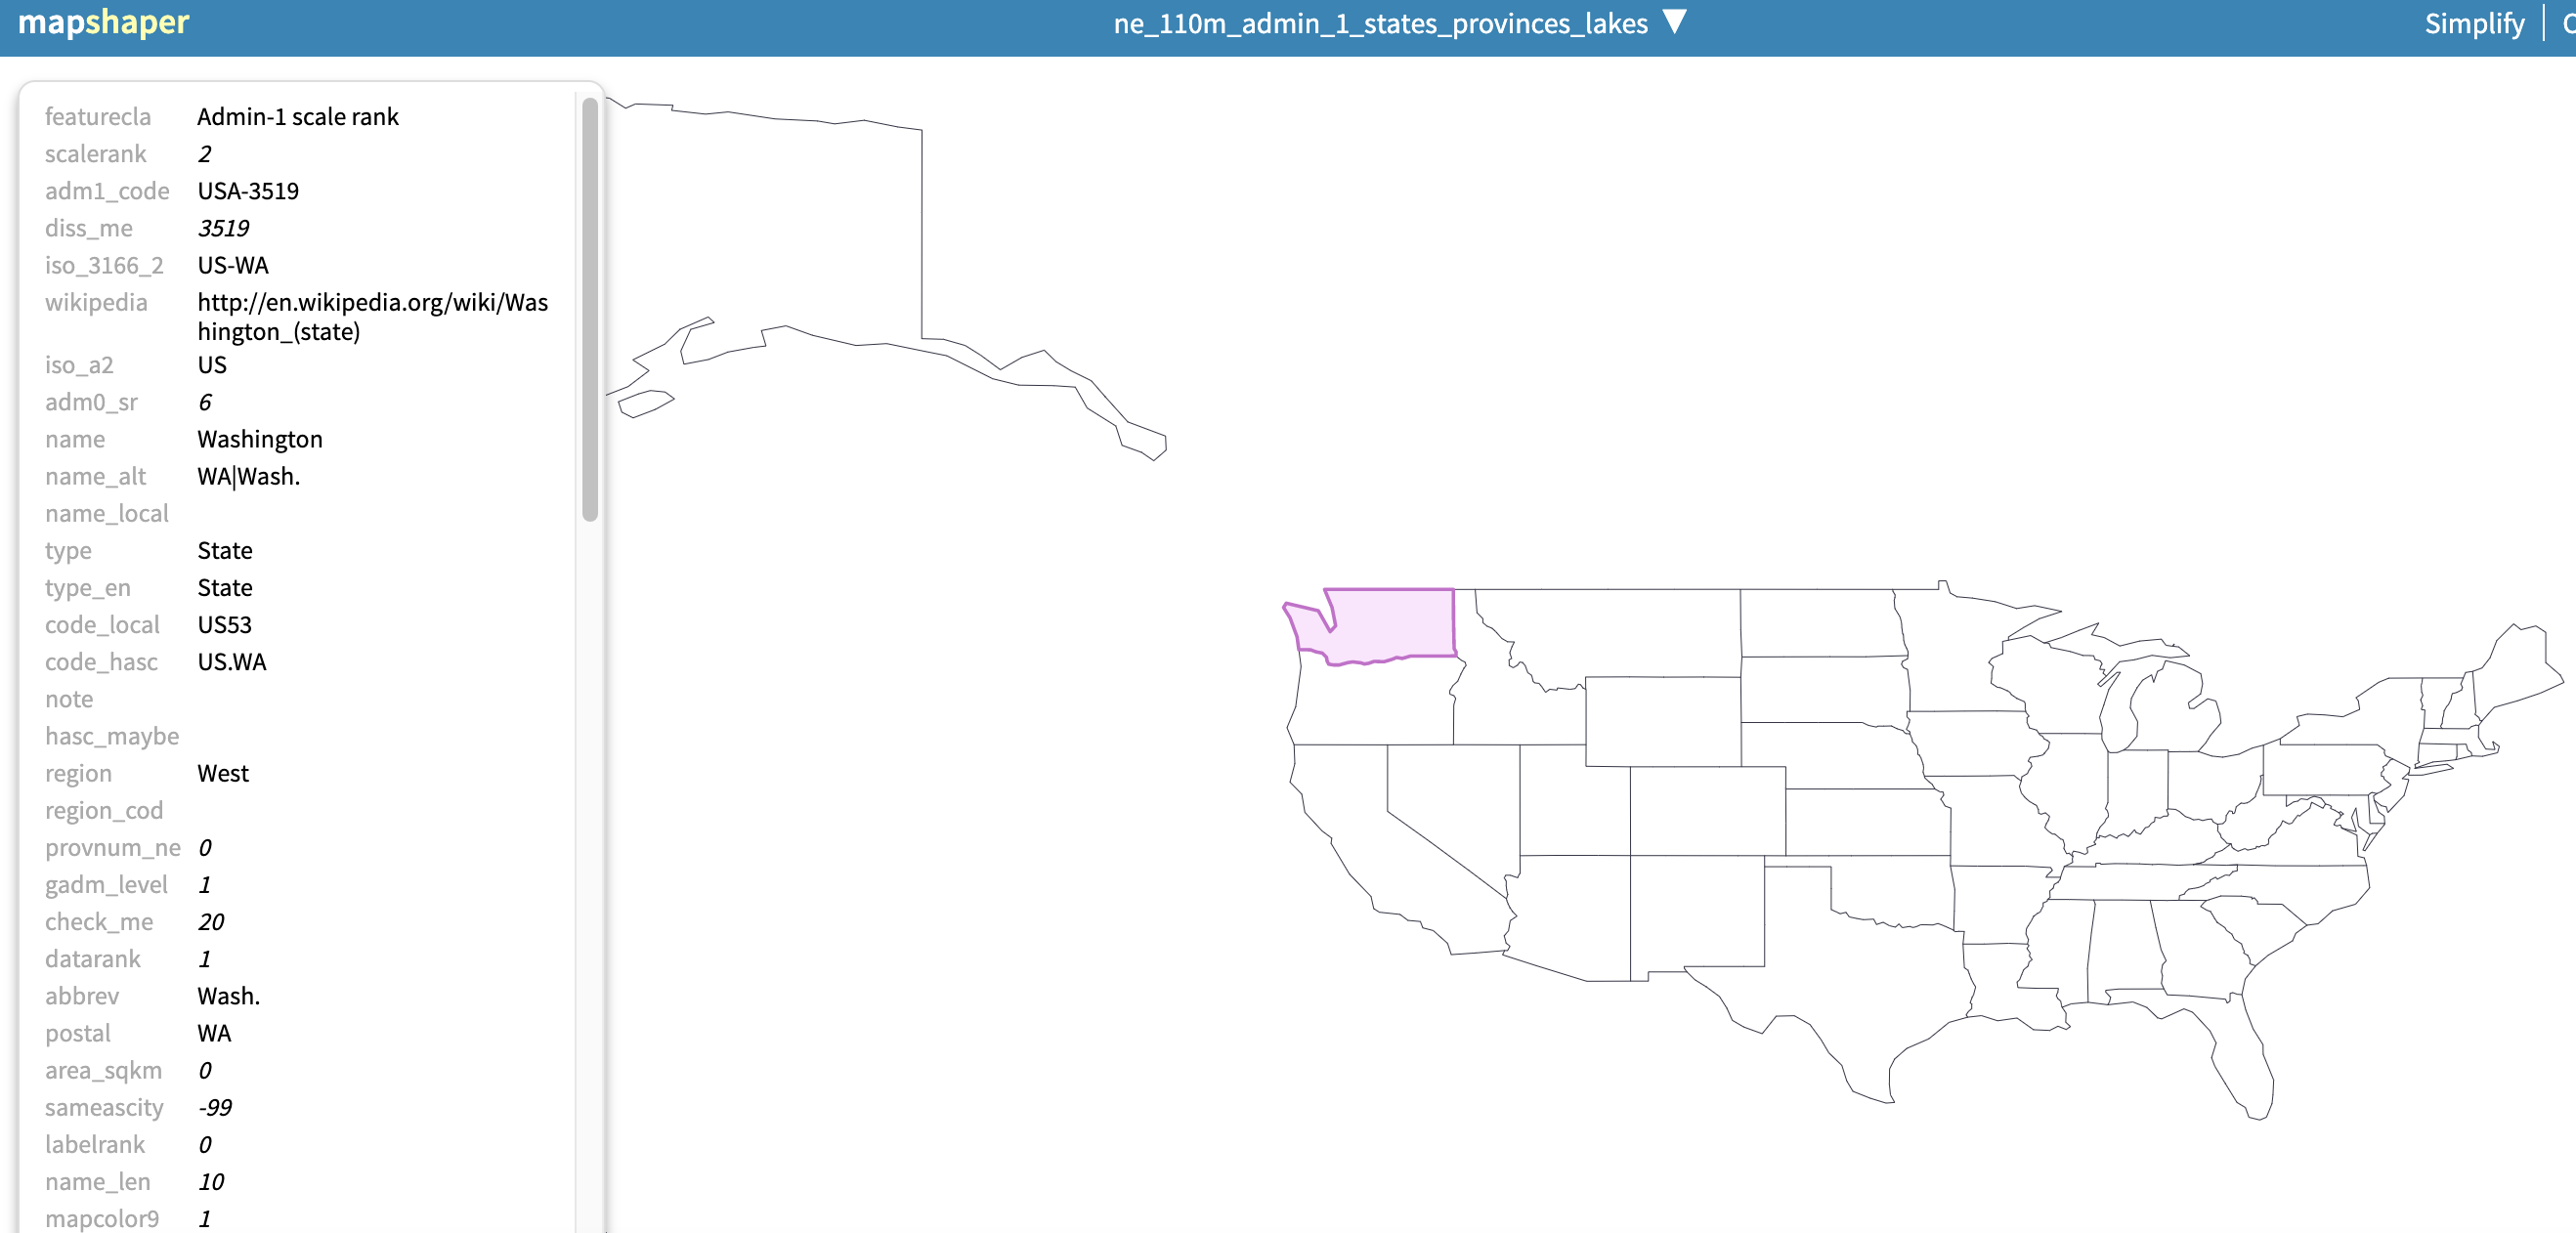
In scanning this list, we see that the iso_3166_2 attribute closely corresponds to the unit group identifier pattern, just missing the state_ prefix. We’ll transform this attribute until it matches.
Generating the Map Files for MEC
The Geographic Heat Map module requires two JSON files to display the map:
- The TopoJSON file, containing the polygon shapes that make up the map itself and the attributes associated with each polygon region; and
- The parameters file, containing details needed to display the map as a 2D projection in the Experience Cloud module.
Generating the TopoJSON file
Start by uncompressing the map ZIP file to get access to the individual files contained within:
unzip ne_110m_admin_1_states_provinces_lakes.zip
When running MapShaper, take the iso_3166_2 attribute out of each shape and transform it into the unit group identifier format using the filter-fields and each options:
mapshaper \
    # Load the map shape file containing the attributes
    -i "files=ne_110m_admin_1_states_provinces_lakes.shp" \
    # Keep only the attribute we care about
    -filter-fields fields="iso_3166_2" \
    # Prepend the attribute with the state_ prefix and store as "id"
    -each "id='state_' + this.properties.iso_3166_2" \
    # Output the map data in TopoJSON format
    -o - \
        format=topojson \
        prettify \
        id-field="id" \
    # Pretty-print the TopoJSON file for inspection later
    | jq . > map-data.json
To check your work, load the map-data.json file into the MapShaper UI and inspect the attribute as before.
Generating the Parameters File
In a standard text editor, save the following JSON as parameters.json:
{
  "scale": 900,
  "width": 1500,
  "height": 600,
  "latCenter": 263,
  "longCenter": 39,
  "projection": "geoAlbersUsa",
  "rotation": [
    0,
    0,
    0
  ]
}
For other maps, you will need to iteratively test with MEC and tweak the values above to get the rendering you want. Available projections can be found at https://github.com/d3/d3-geo-projection#projections.
Using the Generated Files Within MEC
Once the TopoJSON map data and parameters files have been generated, upload the files to your CDN of choice. The files will need to be available on the Internet for use by MEC Reporting users. For the purposes of this guide, we will assume the files are accessible at the following URLs:
- https://cdn.example.com/medallia/topojson/map-data.json
- https://cdn.example.com/medallia/topojson/parameters.json
Within the Geographic Heat Map Module, set the Map value in Visualizations to URL (Advanced):
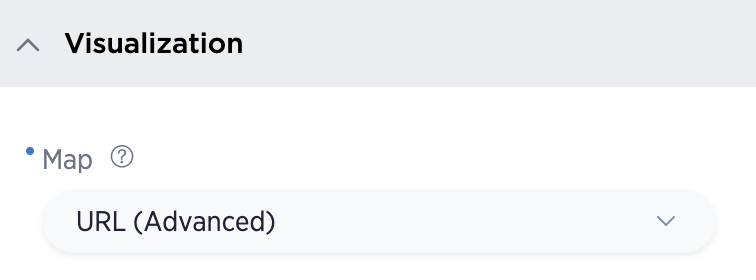
In the Advanced section, enter in the URLs for the Map Data and Parameters files:
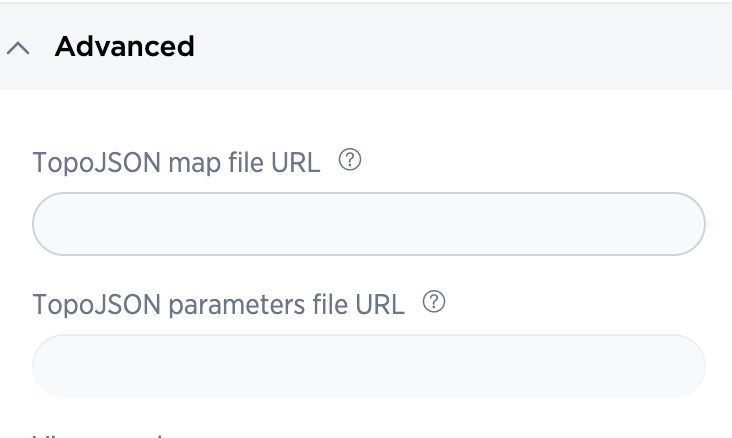
Save the module configuration. You should see the module now rendering on the preview pane on the right and on the dashboard for standard users.
Troubleshooting
If your map does not display, please verify that the files are accessible over the Internet. Use of incognito windows and other network connections may aid in troubleshooting connectivity issues.
If the map does not render exactly how you’d like, iteratively play with the values in the Parameters file. Try different projections, lat/lon pairs, width/height values, etc.
Conclusion
This guide explained how to create an Experience Cloud-ready TopoJSON map for the Geographic Heat Map reporting module. It used U.S. States data available in the public domain for example purposes.
Medallia has published a reference implementation at medallia/custom-geo-heat-map-for-mec-reporting. The reference implementation provides a command-line-based mechanism for accomplishing all the steps outlined in this document. Using it, you can generate your own custom TopoJSON files. Full source code and usage details are available.
Updated over 2 years ago